yea...u r right...the blog is named after her...still her first post?? was waitin for her to back in action. She was really bsy these days .. Now she is a bit relaxed & is back to baking & xperimenting.... bt easy recipes though...
I can't say much abt ths muffins as I did never taste it...bt ma daughter luvs ths a lot & requests her grandma to make it for her on her vacations...
Here goes the recipe as said by ma mamma...
Ingredients:
eggs 3
sugar 1 cup
oil 1/2 cup milk 1/2 cup
baking soda 1 tsp
cinnamon powder 1/4 tsp (original recipe is to add 2 tbsp)
maida 2 cups
banana 2
prunes/blueberry 1 tbsp(blueberry ws in the original recipe..she added prunes)
she added choco chips for kids...if u wish u can add 1/2 cup.
Method:
Sieve flour and baking soda together....add cinnamon powder to this & also the prunes/choco chips/ blueberry & nuts to it. Mix & keep aside.
Mash banana using a fork ..Its okay if ther's banana chunks here & ther.
Beat eggs & sugar until mixed well...u can beat it with hand too...add milk & beat again.
Then pour in oil...mix well.
Add mashed banana, mix well & then mix in the flour mixture..
Bake in muffin cups 170 degrees to 12 to 15 mts..(if small cups)
dust sugar powder or icing sugar on top... & her grand kids luv it hot !!
aah!! at last....!! I was drooling over all these days since I saw Rasgulla cake in Master Chef.. But was waiting for atleast some people over here to finish it off ..otherwise the whole cake ll ve to be stuffed into ma tummy !! I'm not a great fan of Rasgullas...don really like the spongy texture of it. But rasgullas with the cake & chocolates is just out of this world. You should all give it a try. Ma kids & hubby don't lik so mch of cream...so coated it lightly with a thin layer of lite cream & with no sugar as rasgullas itself made it enough sweetier.
The recipe in starplus website is not complete in itself. its not clear at all...so i made ma own version of it; like I've baked the usual black forest sponge; ie; with the egg whereas master chef contestants made it eggless. they didn't mention abt blueberry compote used n the cake.Ther were many such flaws in the recipe given..lik layering details whether they used rasgullas to fill both the gaps between the layers or just in between one layer.
This is a two tier cake (double layered) chocolate cake at the bottom & black forest at the top. The bottom part is small as there were no much people here to finish it off...
1.Prepare chocolate curls. For that, first melt the chocolate in microwave high for 1 min. or slightly more, mix it well & spread the chocolate on a flat surface evenly with a flat knife.You can do it in a double boiler also.Leave it to cool slightly and then push it with a knife into curls slowly. You can c the video below. Don't allow it to cool till it becomes hard as I did. I made this for the first time & it was too hard. I didn't have time to repeat whole procedure again. So used it as it is. You can c the result in ma pic. i didn't get the curls... :)) You can also shave a chocolate using vegetable peeler. For this, the chocolate should be in room temperature. You can microwave the chocolate for 10 sec. to make it to room temperature.
2. Now to make the sponge:
1.Melt butter in a pan separately and leave it to cool.
2.Take the eggs in a bowl & beat it along with sugar till it turns pale & frothy. for about 10-15minutes.
3.Add vanilla essence to it.
4.Sieve together flour and cocoa powder atleast 2 times. And again a third time into the egg & sugar mixture in 3 batches. Fold in nicely. Do not overbeat it. If so, the cake will turn harder .
5.Add melted butter into it & mix well. (the melted butter should neither be too hot nor too cold that it gets hardened.
6.Pour into the greased oven dish & bake it for 40-45 minutes at 170-180 degrees.
7.Allow the cake to cool nicely before assembling.
For layering:
1.Cut the sponge evenly into 3 layers. Rotate the sponge & cut to get even layers.
2.Brush slightly with the rasgulla syrup. Don't use more syrup as ther's enough syrup in rasgullas .
3.Spread a thin layer of cream over it.
4.Arrange rasgullas,tangerines & sweet limes alternatively as shown in the below picture..
5.Drop in 2-3 tbsp of blueberry compote over it.
6.Now layer the second sponge above it. Press slightly. Repeat the same procedure. Now start with the tangerines on the edges as we should get both the rasgullas & tangerines in every bite.
7.Close it with the third layer. Press slightly
8.Now coat the cake with the remaining cream evenly on the top & sides. Here, we might not be able to coat nicely on the sides as ther is a slightly big gap between layers cos of Rasgullas. Its fine as you can cover it up with the chocolate curls..
9.Press the chocolate curls on the sides & garnish on the top. You can use melons also here to garnish as seen in the programme... I didn't have that , so used half rasgulla ...
**Blueberry compote can also be made by combining 1 cup of blueberries with 1/2 cup of sugar in a pan; Add 3-4 tbsp of water & cook till thick and let it cool.
Its Award time: I'm so happy to receive ma second award ie; ONE LOVELY BLOG AWARD gifted by Tahemeem of Not So Gourmet
Thanx a lot Tahemeem...Its so nice of her to share ths award with me.. It has been only 4 months or so that I've started blogging and that too inspired frm Shabeena of Shabs cusine.. Thanx to her ...sharing this moment with her too...
There are some rules with this award. Here they are: 1. Accept the award. Post it on your blog with the name of the person who has granted the award and his or her blog link. 2. Pay it forward to 15 other bloggers. Please don't leave it general and just invite all your blogger friends to collect the Award. It's always nice to be nominated so please do the favor and nominate 15 bloggers to share the Award with. 3. Contact those blog owners and let them know they’ve been chosen.
I would love to share ma award with all these fellow bloggers...was completely confused to choose 15 from many...but then, had to choose randomly..
Milk 4 cups
Cane Sugar 1 1/2 cups
Lemon juice 2 tbsp+ 1 tbsp water
.
Method:
Boil the milk at medium high. Do stir occassionally...otherwise the milk will get burnt. Let it boil.
Add the lemon juice slowly.Now,the milk start separating frm the water. Leave it for a few minutes.
Drain this water in a muslin cloth.Run cold water through it. Squeeze out maximum water possible.
Now keep the sugar & 4 1/2 cups of water to boil to make the syrup in a pressure cooker. Don't close the lid now. The syrup should be so thin. Just allowing it to dissolve in water is enough.
To check whether the paneer is ready, you can take a few in your palm & rub it for a few seconds & then if you could make a smooth ball with it, paneer is ready .
When the paneer is ready, knead it well & make a few balls with them. This ball will double in size once cooked them in syrup. So take care of that while shaping them.
Now put those balls in the syrup & close the lid of the pressure cooker. After one whistle, simmer the flame for about 7 minutes.
Open them, cool & serve.
Now in certain cases, the balls may be broken or flat (out of shape). Don't worry, as u can turn them into another dessert.
If these are scattered, drain them, boil some milk & make a kheer with them garnished with almonds & pistachios. I'm sure you would luv them. And if they are flat, make rasmalais... :))
Butter 225 g
Caster sugar 225 g
Self raising flour 225 g
Salt a pinch
Baking powder 3/4 tsp
Eggs 4
Cocoa powder 2 tbsp
Milk 7 tbsp
Vanilla essence 1 tsp
Method:
Preheat oven to 170 degrees Celsius. (If you have 'CAKE' option in your oven, then jst click it)
Mix cocoa powder with half of the milk and leave aside.
In a separate bowl, beat butter and sugar till soft and creamy. Add eggs, one at a time, beating well after each addition. Add salt.
In another separate bowl, sift flour, baking powder and salt 3 times. Fold in the sifted ingredients into the creamed mixture alternately with milk, starting and ending with flour.
Finally add in vanilla essence and combine well. Transfer 1/3 of the batter into a separate bowl and add the cocoa mixture to it. Mix well.
Scoop the plain batter and chocolate batter alternately into a well greased & floured cake tin. It will now look like a chess board. Run a jam knife or skewer through the batter in an 'S' motion to get a marbled effect. Level the top and bake the cake for 45 to 50 minutes or until a skewer inserted in the centre of the cake comes out clean.
Remove cake from oven and let it cool completely before decorating it.
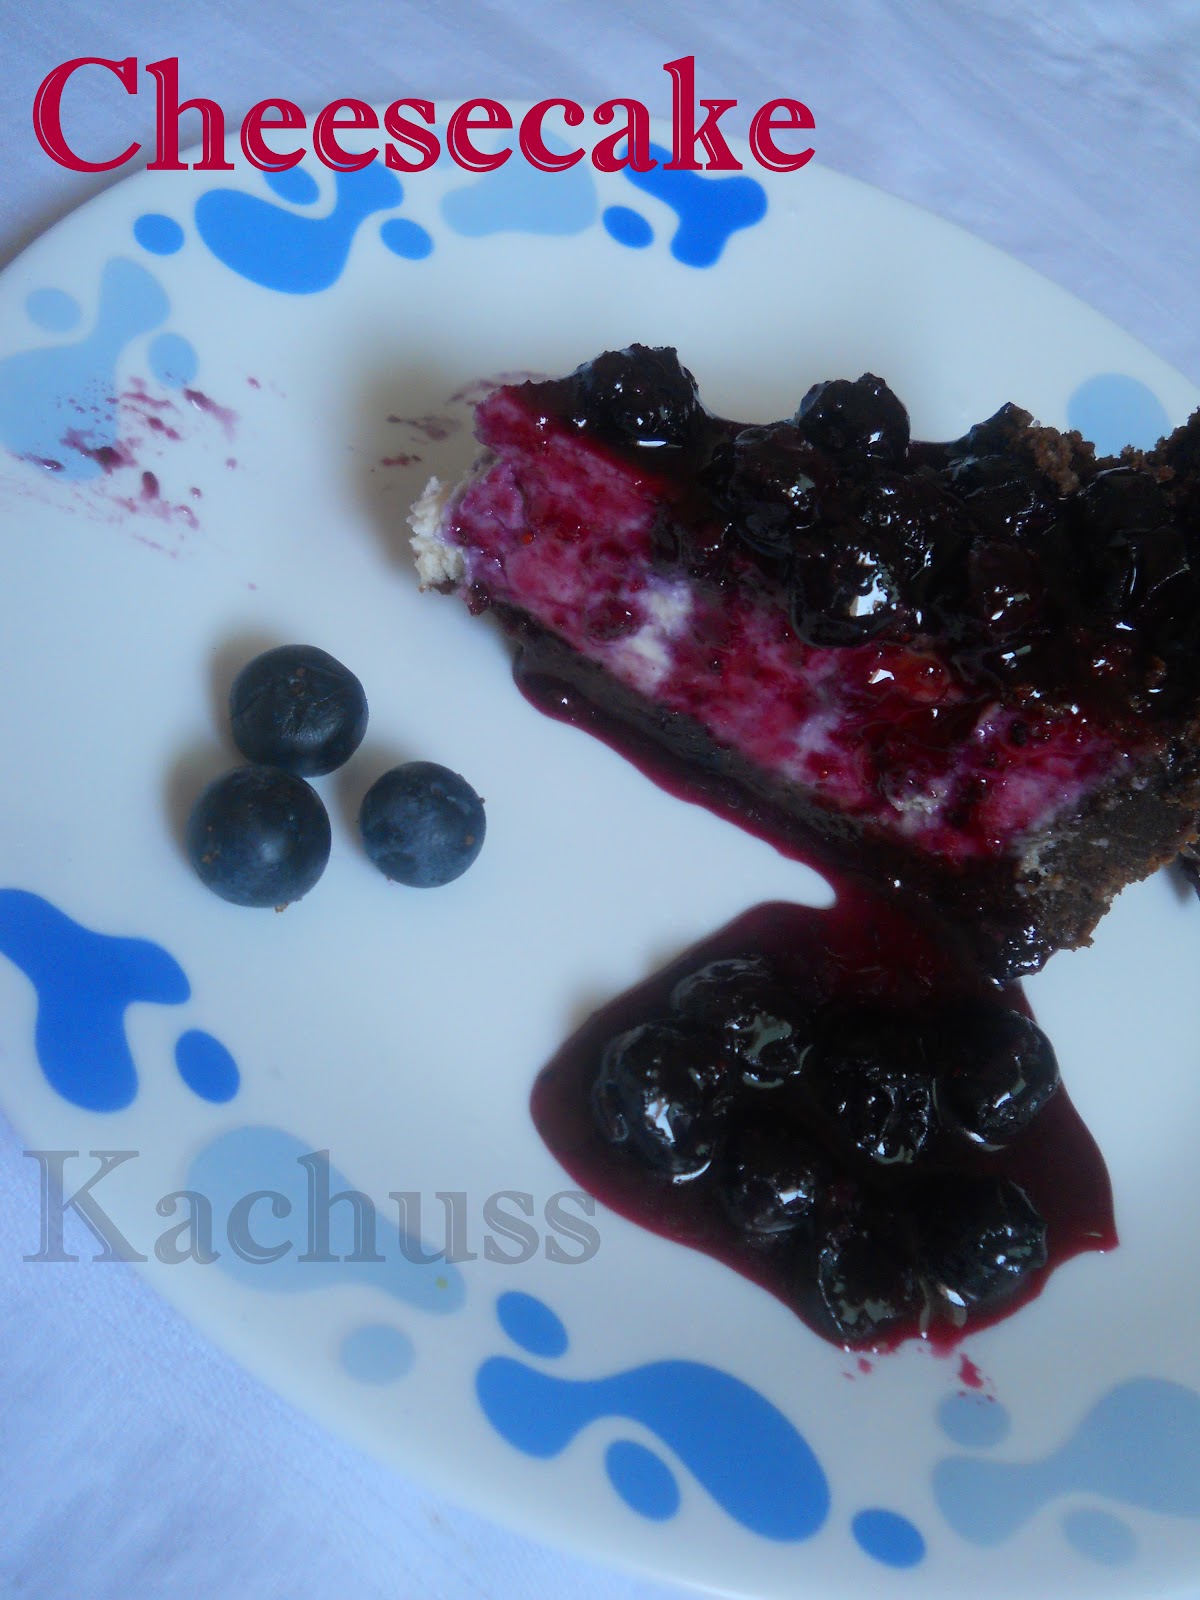
Cheesecakes....the name itself fills my mouth with water that a small boat could easily be driven on it.. My first attempt on cheesecakes was some 3 years back when there was a small gathering in my house after ma cousin's marriage. That was a non-baked one; was okay but the base was not set..may be the butter i used was not enough. But still I didn't give up, the second one was better than that...Since then, it has been one of my favorite dessert...and the blueberry syrup tops it all. I was hesitant to buy blueberries always becos of its sour taste. We can't find the best of it in this part of the world where I lives.So used to depend on the canned blueberry topping. But this time I dared to buy some and it turned out delicious. It was so sweet that I thought of trying it at home and I just loved it....awesome, delicious or ' RAD RAPPAD RAPCHUND RAPCHUNDAS BAPKA' (as per the words of Vaibhavi merchant)
This is from Martha's collections, as usual, could do justice to the recipe ,but not in looks. Next time I should work more on its looks and will update the pictures so.. The base was not even and this was the first time i tried the upper crust. I would have made it more thinner.
RECIPE TIME:(I took half the meausure ,which ws enough for my family of 4)
BLUEBERRY TOPPING (you can make it with or without the topping)
Ingredients:(Makes enough for 1 cheesecake)
1 1/2 pints (3 cups) blueberries
3/4 cup sugar
2 tablespoons unsalted butter
2 tablespoons fresh lemon juice
1 tablespoon cornstarch
Method:
Combine all ingredients in a saucepan over medium-high heat. Bring to a simmer, and cook until berries break down, about 4 minutes. Let cool, then refrigerate, covered, until cold (or up to 3 days).
CHEESECAKE:
INGREDIENTS:(Serves 8 to 10)
Vegetable-oil cooking spray
6 tablespoons unsalted butter, melted
2 cups graham cracker crumbs/Digestive biscuits/bourbon biscuits
3 tablespoons sugar
1/4 teaspoon ground cinnamon
Pinch of salt
16 ounces cream cheese, room temperature
16 ounces sour cream/hung yoghurt
1 cup sugar
3 large eggs
1 1/2 teaspoons finely grated lemon zest
1 teaspoon pure vanilla extract
Boiling water, for roasting pan
Blueberry Topping
Method:
Make the crust: Preheat oven to 325F (160C). Coat a 9-inch springform pan with cooking spray. Wrap exterior of pan (including base) with foil.
Stir together butter, graham cracker crumbs, sugar, cinnamon, and salt. Press mixture firmly into bottom and 3 inches up sides of pan. Refrigerate 15 minutes.
Make the filling: Beat cream cheese with a mixer on medium speed until fluffy. Reduce speed to low, and add sour cream***, sugar, eggs, lemon zest, and vanilla. Beat until well combined (do not overmix). Pour into chilled crust.
Set springform pan in a large, shallow roasting pan. Place in oven. Carefully ladle enough boiling water into roasting pan to come halfway up sides of springform pan. Bake until cheesecake is set but still slightly wobbly in center, about 1 hour, 15 minutes. (it took 30 mts for me as i baked for half the measurement & ma oven also requires slightly lesser time than in other ovens) Transfer roasting pan to a wire rack. Let cake cool in roasting pan 30 minutes. Remove cheesecake from roasting pan, and refrigerate, uncovered, at least 8 hours (or overnight).
Run a knife around edge of cake, and unmold. Spoon topping over cake.
**Hung Yogurt can be prepared in home by hanging yogurt tied in a muslin cloth. If you can't find any place to hang it, you can place the same on a strainer(after tying in a cloth)kept over a deep bottomed vessel for few hours.
***You can buy already made graham cracker crumbs in a bag or box. Buying your graham crackers crumbs already made is quick and time saving but it can cost you more then if you make the graham cracker crumbs yourself.
When you make your own graham cracker crumbs all you need is the graham crackers, a rolling pin and a sealable plastic bag.
To make graham cracker crumbs take the plastic bag and put in some crumbled graham crackers. Then seal the plastic bag well so the crumbs you make can't escape out of the plastic bag.
After your crumbled graham crackers are in the plastic bag take the plastic bag full of crumbled graham crackers and lay it flat on a flat surface like a counter top.
Take the rolling pin and roll it over the plastic bag full of graham cracker crumbles. Keep rolling the rolling pin over the plastic bag of graham cracker until you see that the graham crackers are turning into crumbs. You can see where the rolling pin needs to go as you roll it over the plastic bag. Try to get all the large pieces of graham cracker to crumble.
When you are done you should have a plastic bag of graham cracker crumbs to use for all your favorite recipes needing graham cracker crumbs. You can store any graham cracker crumbs that you don't use in the plastic bag for future use. The graham cracker crumbs will stay good to use in a plastic bag for a long time.
yea...u r right...the blog is named after her...still her first post?? was waitin for her to back in action. She was really bsy these days .. Now she is a bit relaxed & is back to baking & xperimenting.... bt easy recipes though...
I can't say much abt ths muffins as I did never taste it...bt ma daughter luvs ths a lot & requests her grandma to make it for her on her vacations...
Here goes the recipe as said by ma mamma...
Ingredients:
eggs 3
sugar 1 cup
oil 1/2 cup milk 1/2 cup
baking soda 1 tsp
cinnamon powder 1/4 tsp (original recipe is to add 2 tbsp)
maida 2 cups
banana 2
prunes/blueberry 1 tbsp(blueberry ws in the original recipe..she added prunes)
she added choco chips for kids...if u wish u can add 1/2 cup.
Method:
Sieve flour and baking soda together....add cinnamon powder to this & also the prunes/choco chips/ blueberry & nuts to it. Mix & keep aside.
Mash banana using a fork ..Its okay if ther's banana chunks here & ther.
Beat eggs & sugar until mixed well...u can beat it with hand too...add milk & beat again.
Then pour in oil...mix well.
Add mashed banana, mix well & then mix in the flour mixture..
Bake in muffin cups 170 degrees to 12 to 15 mts..(if small cups)
dust sugar powder or icing sugar on top... & her grand kids luv it hot !!
aah!! at last....!! I was drooling over all these days since I saw Rasgulla cake in Master Chef.. But was waiting for atleast some people over here to finish it off ..otherwise the whole cake ll ve to be stuffed into ma tummy !! I'm not a great fan of Rasgullas...don really like the spongy texture of it. But rasgullas with the cake & chocolates is just out of this world. You should all give it a try. Ma kids & hubby don't lik so mch of cream...so coated it lightly with a thin layer of lite cream & with no sugar as rasgullas itself made it enough sweetier.
The recipe in starplus website is not complete in itself. its not clear at all...so i made ma own version of it; like I've baked the usual black forest sponge; ie; with the egg whereas master chef contestants made it eggless. they didn't mention abt blueberry compote used n the cake.Ther were many such flaws in the recipe given..lik layering details whether they used rasgullas to fill both the gaps between the layers or just in between one layer.
This is a two tier cake (double layered) chocolate cake at the bottom & black forest at the top. The bottom part is small as there were no much people here to finish it off...
1.Prepare chocolate curls. For that, first melt the chocolate in microwave high for 1 min. or slightly more, mix it well & spread the chocolate on a flat surface evenly with a flat knife.You can do it in a double boiler also.Leave it to cool slightly and then push it with a knife into curls slowly. You can c the video below. Don't allow it to cool till it becomes hard as I did. I made this for the first time & it was too hard. I didn't have time to repeat whole procedure again. So used it as it is. You can c the result in ma pic. i didn't get the curls... :)) You can also shave a chocolate using vegetable peeler. For this, the chocolate should be in room temperature. You can microwave the chocolate for 10 sec. to make it to room temperature.
2. Now to make the sponge:
1.Melt butter in a pan separately and leave it to cool.
2.Take the eggs in a bowl & beat it along with sugar till it turns pale & frothy. for about 10-15minutes.
3.Add vanilla essence to it.
4.Sieve together flour and cocoa powder atleast 2 times. And again a third time into the egg & sugar mixture in 3 batches. Fold in nicely. Do not overbeat it. If so, the cake will turn harder .
5.Add melted butter into it & mix well. (the melted butter should neither be too hot nor too cold that it gets hardened.
6.Pour into the greased oven dish & bake it for 40-45 minutes at 170-180 degrees.
7.Allow the cake to cool nicely before assembling.
For layering:
1.Cut the sponge evenly into 3 layers. Rotate the sponge & cut to get even layers.
2.Brush slightly with the rasgulla syrup. Don't use more syrup as ther's enough syrup in rasgullas .
3.Spread a thin layer of cream over it.
4.Arrange rasgullas,tangerines & sweet limes alternatively as shown in the below picture..
5.Drop in 2-3 tbsp of blueberry compote over it.
6.Now layer the second sponge above it. Press slightly. Repeat the same procedure. Now start with the tangerines on the edges as we should get both the rasgullas & tangerines in every bite.
7.Close it with the third layer. Press slightly
8.Now coat the cake with the remaining cream evenly on the top & sides. Here, we might not be able to coat nicely on the sides as ther is a slightly big gap between layers cos of Rasgullas. Its fine as you can cover it up with the chocolate curls..
9.Press the chocolate curls on the sides & garnish on the top. You can use melons also here to garnish as seen in the programme... I didn't have that , so used half rasgulla ...
**Blueberry compote can also be made by combining 1 cup of blueberries with 1/2 cup of sugar in a pan; Add 3-4 tbsp of water & cook till thick and let it cool.
Its Award time: I'm so happy to receive ma second award ie; ONE LOVELY BLOG AWARD gifted by Tahemeem of Not So Gourmet
Thanx a lot Tahemeem...Its so nice of her to share ths award with me.. It has been only 4 months or so that I've started blogging and that too inspired frm Shabeena of Shabs cusine.. Thanx to her ...sharing this moment with her too...
There are some rules with this award. Here they are: 1. Accept the award. Post it on your blog with the name of the person who has granted the award and his or her blog link. 2. Pay it forward to 15 other bloggers. Please don't leave it general and just invite all your blogger friends to collect the Award. It's always nice to be nominated so please do the favor and nominate 15 bloggers to share the Award with. 3. Contact those blog owners and let them know they’ve been chosen.
I would love to share ma award with all these fellow bloggers...was completely confused to choose 15 from many...but then, had to choose randomly..
Milk 4 cups
Cane Sugar 1 1/2 cups
Lemon juice 2 tbsp+ 1 tbsp water
.
Method:
Boil the milk at medium high. Do stir occassionally...otherwise the milk will get burnt. Let it boil.
Add the lemon juice slowly.Now,the milk start separating frm the water. Leave it for a few minutes.
Drain this water in a muslin cloth.Run cold water through it. Squeeze out maximum water possible.
Now keep the sugar & 4 1/2 cups of water to boil to make the syrup in a pressure cooker. Don't close the lid now. The syrup should be so thin. Just allowing it to dissolve in water is enough.
To check whether the paneer is ready, you can take a few in your palm & rub it for a few seconds & then if you could make a smooth ball with it, paneer is ready .
When the paneer is ready, knead it well & make a few balls with them. This ball will double in size once cooked them in syrup. So take care of that while shaping them.
Now put those balls in the syrup & close the lid of the pressure cooker. After one whistle, simmer the flame for about 7 minutes.
Open them, cool & serve.
Now in certain cases, the balls may be broken or flat (out of shape). Don't worry, as u can turn them into another dessert.
If these are scattered, drain them, boil some milk & make a kheer with them garnished with almonds & pistachios. I'm sure you would luv them. And if they are flat, make rasmalais... :))
Butter 225 g
Caster sugar 225 g
Self raising flour 225 g
Salt a pinch
Baking powder 3/4 tsp
Eggs 4
Cocoa powder 2 tbsp
Milk 7 tbsp
Vanilla essence 1 tsp
Method:
Preheat oven to 170 degrees Celsius. (If you have 'CAKE' option in your oven, then jst click it)
Mix cocoa powder with half of the milk and leave aside.
In a separate bowl, beat butter and sugar till soft and creamy. Add eggs, one at a time, beating well after each addition. Add salt.
In another separate bowl, sift flour, baking powder and salt 3 times. Fold in the sifted ingredients into the creamed mixture alternately with milk, starting and ending with flour.
Finally add in vanilla essence and combine well. Transfer 1/3 of the batter into a separate bowl and add the cocoa mixture to it. Mix well.
Scoop the plain batter and chocolate batter alternately into a well greased & floured cake tin. It will now look like a chess board. Run a jam knife or skewer through the batter in an 'S' motion to get a marbled effect. Level the top and bake the cake for 45 to 50 minutes or until a skewer inserted in the centre of the cake comes out clean.
Remove cake from oven and let it cool completely before decorating it.
Cheesecakes....the name itself fills my mouth with water that a small boat could easily be driven on it.. My first attempt on cheesecakes was some 3 years back when there was a small gathering in my house after ma cousin's marriage. That was a non-baked one; was okay but the base was not set..may be the butter i used was not enough. But still I didn't give up, the second one was better than that...Since then, it has been one of my favorite dessert...and the blueberry syrup tops it all. I was hesitant to buy blueberries always becos of its sour taste. We can't find the best of it in this part of the world where I lives.So used to depend on the canned blueberry topping. But this time I dared to buy some and it turned out delicious. It was so sweet that I thought of trying it at home and I just loved it....awesome, delicious or ' RAD RAPPAD RAPCHUND RAPCHUNDAS BAPKA' (as per the words of Vaibhavi merchant)
This is from Martha's collections, as usual, could do justice to the recipe ,but not in looks. Next time I should work more on its looks and will update the pictures so.. The base was not even and this was the first time i tried the upper crust. I would have made it more thinner.
RECIPE TIME:(I took half the meausure ,which ws enough for my family of 4)
BLUEBERRY TOPPING (you can make it with or without the topping)
Ingredients:(Makes enough for 1 cheesecake)
1 1/2 pints (3 cups) blueberries
3/4 cup sugar
2 tablespoons unsalted butter
2 tablespoons fresh lemon juice
1 tablespoon cornstarch
Method:
Combine all ingredients in a saucepan over medium-high heat. Bring to a simmer, and cook until berries break down, about 4 minutes. Let cool, then refrigerate, covered, until cold (or up to 3 days).
CHEESECAKE:
INGREDIENTS:(Serves 8 to 10)
Vegetable-oil cooking spray
6 tablespoons unsalted butter, melted
2 cups graham cracker crumbs/Digestive biscuits/bourbon biscuits
3 tablespoons sugar
1/4 teaspoon ground cinnamon
Pinch of salt
16 ounces cream cheese, room temperature
16 ounces sour cream/hung yoghurt
1 cup sugar
3 large eggs
1 1/2 teaspoons finely grated lemon zest
1 teaspoon pure vanilla extract
Boiling water, for roasting pan
Blueberry Topping
Method:
Make the crust: Preheat oven to 325F (160C). Coat a 9-inch springform pan with cooking spray. Wrap exterior of pan (including base) with foil.
Stir together butter, graham cracker crumbs, sugar, cinnamon, and salt. Press mixture firmly into bottom and 3 inches up sides of pan. Refrigerate 15 minutes.
Make the filling: Beat cream cheese with a mixer on medium speed until fluffy. Reduce speed to low, and add sour cream***, sugar, eggs, lemon zest, and vanilla. Beat until well combined (do not overmix). Pour into chilled crust.
Set springform pan in a large, shallow roasting pan. Place in oven. Carefully ladle enough boiling water into roasting pan to come halfway up sides of springform pan. Bake until cheesecake is set but still slightly wobbly in center, about 1 hour, 15 minutes. (it took 30 mts for me as i baked for half the measurement & ma oven also requires slightly lesser time than in other ovens) Transfer roasting pan to a wire rack. Let cake cool in roasting pan 30 minutes. Remove cheesecake from roasting pan, and refrigerate, uncovered, at least 8 hours (or overnight).
Run a knife around edge of cake, and unmold. Spoon topping over cake.
**Hung Yogurt can be prepared in home by hanging yogurt tied in a muslin cloth. If you can't find any place to hang it, you can place the same on a strainer(after tying in a cloth)kept over a deep bottomed vessel for few hours.
***You can buy already made graham cracker crumbs in a bag or box. Buying your graham crackers crumbs already made is quick and time saving but it can cost you more then if you make the graham cracker crumbs yourself.
When you make your own graham cracker crumbs all you need is the graham crackers, a rolling pin and a sealable plastic bag.
To make graham cracker crumbs take the plastic bag and put in some crumbled graham crackers. Then seal the plastic bag well so the crumbs you make can't escape out of the plastic bag.
After your crumbled graham crackers are in the plastic bag take the plastic bag full of crumbled graham crackers and lay it flat on a flat surface like a counter top.
Take the rolling pin and roll it over the plastic bag full of graham cracker crumbles. Keep rolling the rolling pin over the plastic bag of graham cracker until you see that the graham crackers are turning into crumbs. You can see where the rolling pin needs to go as you roll it over the plastic bag. Try to get all the large pieces of graham cracker to crumble.
When you are done you should have a plastic bag of graham cracker crumbs to use for all your favorite recipes needing graham cracker crumbs. You can store any graham cracker crumbs that you don't use in the plastic bag for future use. The graham cracker crumbs will stay good to use in a plastic bag for a long time.


 Ingredients: